Tutorial: How to Create an Anne Geddes Baby Portrait
Originally Published March 2009
The sleeping babies of Anne Geddes are some of the most well-known, and best-selling, images in the world. Ever wonder how she does it? Perhaps you’d like to add a line of fantasy images to your portrait photography business. Often, Geddes employs costumes and props in her work. Many times, however, her results are achieved solely through image manipulation. This tutorial will show you how to create a lovely image of a baby sleeping in a tulip, using just a photo of an infant and a stock photo of a flower.
The initial steps also show how to adjust color of a part of your image. You can skip that, but I included it since you may find it helpful. (Note: this image was created by me for Harley Bynum Photography, and is used with permission.)
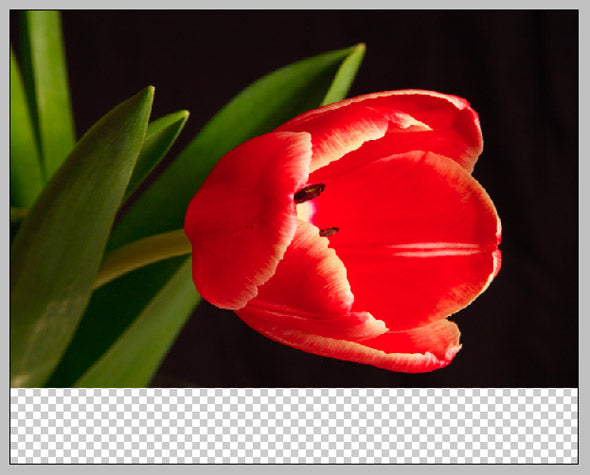
Start with the image of the baby.
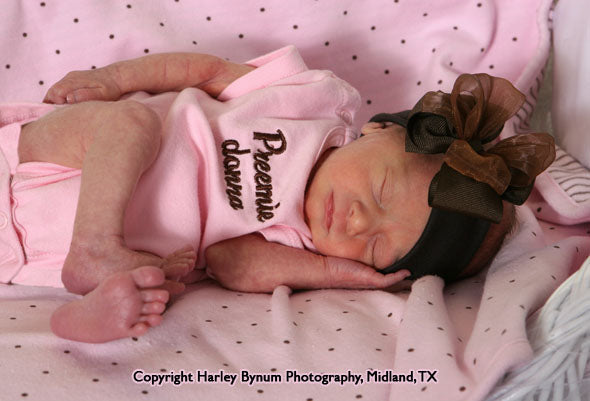
Here is our sleeping babe, a “premie” just 11 days old. My client has requested that I remove the words “Premie Donna” from her outfit, and place her in a flower, preferably a pink tulip. So the first task, after removing the baby from the background and cloning out the wording, is to find a suitable flower for her to sleep in. For this, I turned to my favorite free stock photo site, Stock Exchange.
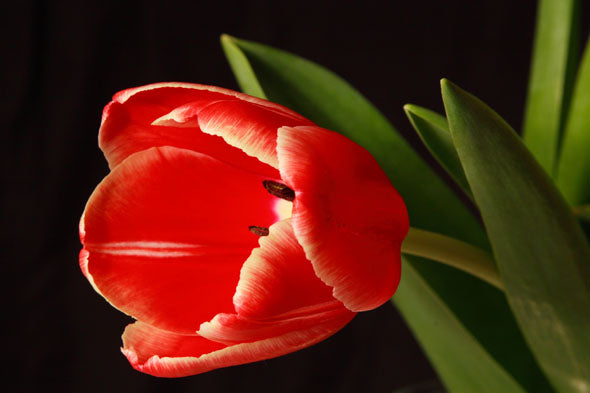
When you’re hunting for a flower, keep in mind that it may be pointed the wrong way, as this one is. It’s also not the right color. But both of these conditions are easily corrected in Photoshop.
Adjust the flower’s color and orientation to suit your subject.
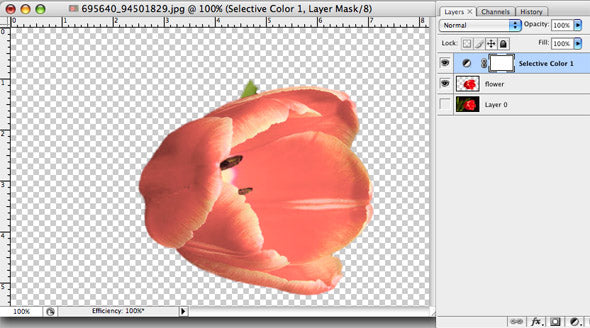
To flip the flower, first select all (Cmd/Ctl + A), then Edit > Transform > Flip Horizontal. Next, we’ll separate the flower from the background, using a masking tool called Fluid Mask3 from Vertus. You could also do the same thing by using the Pen tool to outline the flower, then convert the path to a selection. Or you could try Select > Color Range, which would work pretty well since the red-orange is restricted to the flower. Yet another way is to use a layer mask: go Layer > New Adjustment Layer > Selective Color, and then paint on the layer mask to isolate the flower. Use whatever method works for you. I’ve also added some blank canvas to the bottom, in order to match the required dimensions. Do this by Image > Canvas Size.

Once the flower is separated from the background, use an Adjustment Layer (Layer > New Adjustment Layer > Selective Color) to change the flower’s color. In our case, we need to remove the yellow to give us a more pure pink color.
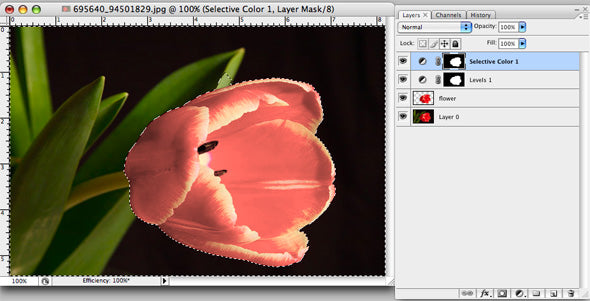
As you can see, we’ve got a pink flower now, but it’s rather pale. So let’s add a Levels adjustment layer (Layer > New Adjustment Layer > Levels). Add this layer UNDER the existing Selective Color layer (see below).

The advantage of using adjustment layers is that you can continue to tweak your settings, or turn them completely off, as you continue to work on the image. These adjustment layers affect ALL of the layers underneath them, so when we turn visibility back on for Layer 0 (the original image), we find that the colors everywhere are affected, not just in the flower. So we need a layer mask. Since the flower is isolated on a transparent background on the Flower layer, it’s simple. Click on the Flower layer to make it active. Then, go Select > Load Selection. Choose “flower transparency” from the Channel dropdown, and hit OK. Just like that, you’ve added a new channel containing your layer mask, AND selected the flower. Now, you will copy this layer mask into the two adjustment layers’ masks. Click on the Levels adjustment layer to make it active. Make sure the selection of the flower is still active (marching ants should be visible). Go Select > Inverse. Make your foreground color black, and select the paint bucket. Click on the image with the paint bucket. This will create a mask for the “non-flower” area. Now click on the Selective Color adjustment layer to activate it. Click on the image with the paint bucket. Your layer masks are done.
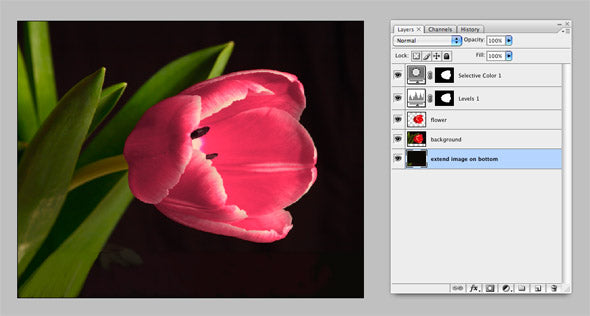
Now we can fill in the blank area at the bottom. You can skip this step if you aren’t enlarging your image. Choose a fairly soft brush, and press Alt/Option to use the eye dropper to select color from the image. In this case it was fairly simple to extend the green foliage and dark background.
Prepare the baby’s image
I’ve removed the baby from the background by first duplicating the image layer, then inserting an empty layer in between. Then I make white the foreground color and fill the empty layer with white, using the paint bucket. Now I activate the baby copy (top layer) and begin to erase the background. The white layer underneath makes it easy to see what I’ve erased. There are two areas along her lower arm where the blanket sticks up. I left those areas alone for now. We will paint them over in the next step.
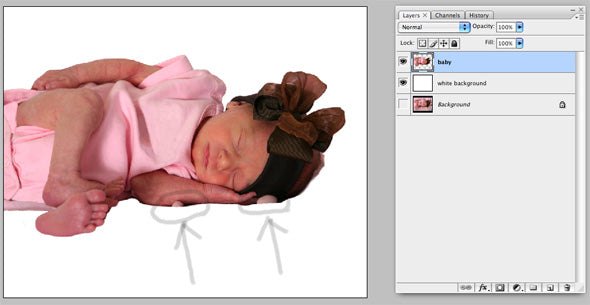
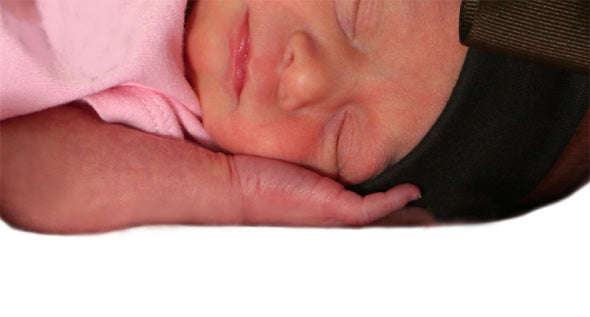
This next image shows the arm after painting it to remove the blanket folds. I’ve also smoothed her blotchy skin a bit, and made the bottom of her arm have a nice even shadow. This will help it look her arm is resting on the tulip surface.
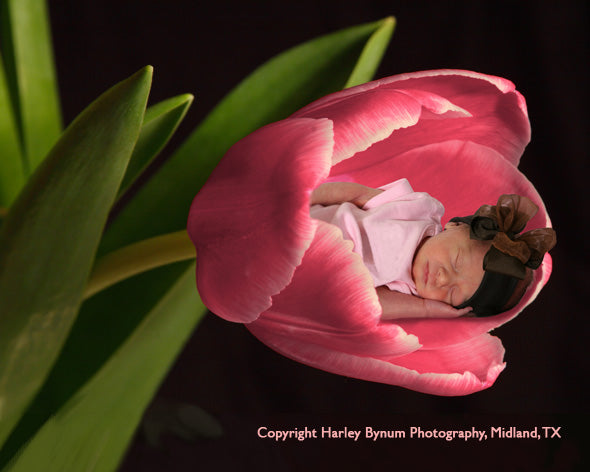
Add the baby to the flower
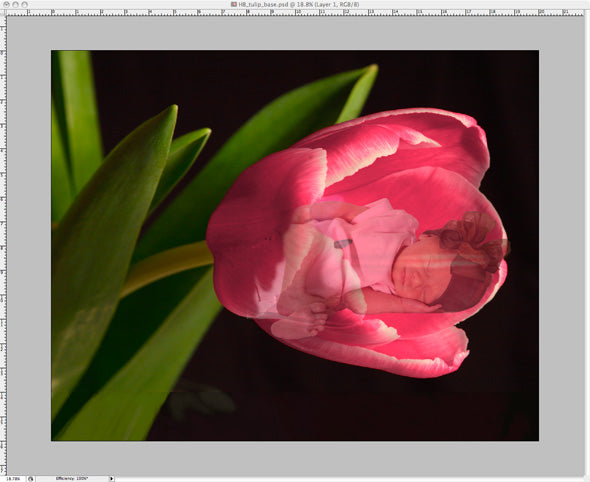
Now we’re ready to place our sleeping babe into the flower. To do this, have both the flower image and the baby image open at the same time. Click and drag on the top layer thumbnail in the layers palette, pulling a copy of it into the flower image. This automatically creates a new layer with the baby on it.
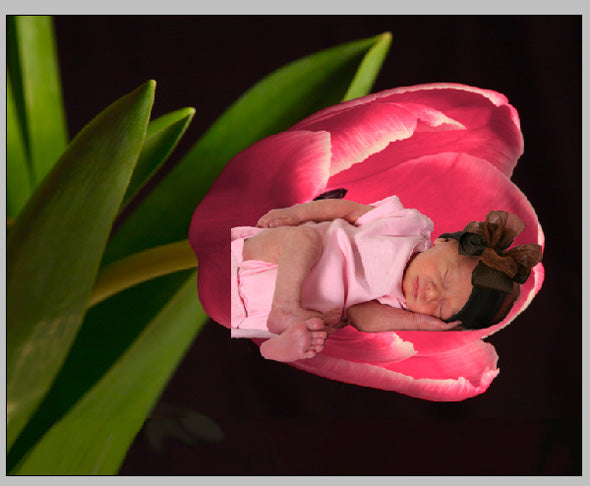
Use the move tool to move the baby to a good spot for sleeping. Adjust her size (go Edit > Transform > Scale) so that she fits nicely. Then, lower the opacity of the Baby layer so that you can see the flower through her. Do your fine adjusting with the move tool. Now use the eraser with a small, soft brush and remove the parts of the baby image on the left side. Erase right up to the outer edge of the tulip. When you’re done, it will look like she’s inside the flower.
Final touches make all the difference
The “trick” to making it look like the baby is really lying on the flower is shadows. In this final step, I added two layers, one below and one above the Baby layer. On the one below, called Shadow Under Arm, I painted with a soft brush to create the shadow. Choose a color from the existing tulip shadow area, behind her head. Also, darken behind her head, since it would be darker there if there were a little head there. On the top layer, I tweaked the shadowing of the arm a bit, adding some pink, which would be reflecting from the tulip if this were real. Another “trick” is to make sure your lighting is consistent. In this case, both baby and flower are lit from in front, more or less. You may need to adjust the overall coloration of one to match the other. For instance, the flower may have a bluish cast that will look wrong with a warmly lit baby. This can really be a problem if the baby’s photo was taken with a bright flash, and the flower wasn’t, for example.
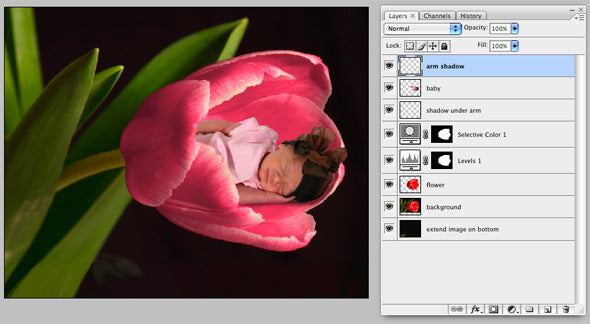
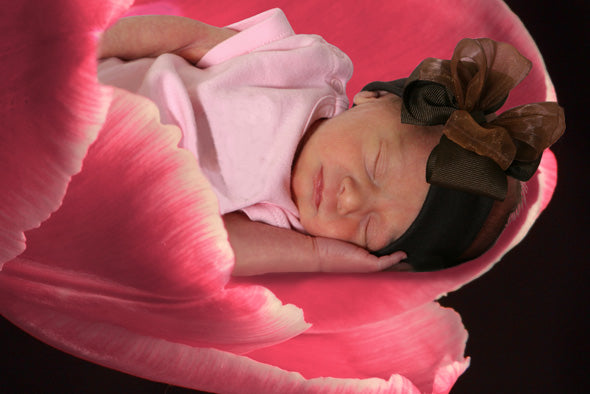
Well, this was a long tutorial, but I hope you were able to follow along. Please leave any questions or comments below, and I’ll try to help out. Here’s a final image, showing a close-up of the finished image. Thanks for reading!